
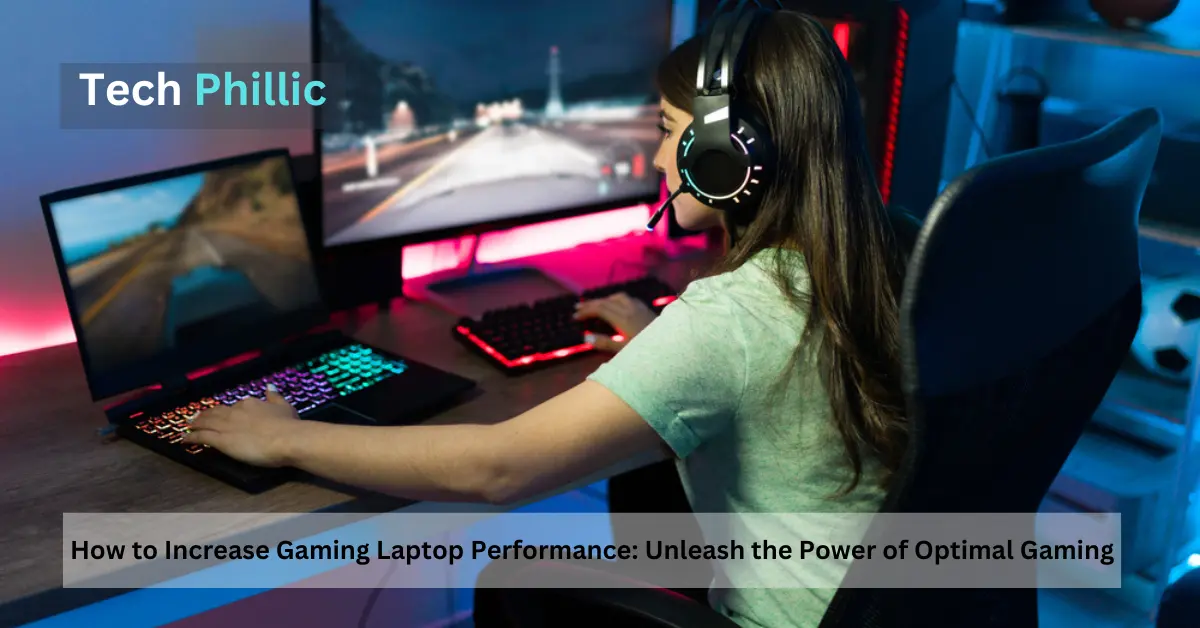
How to Increase Gaming Laptop Performance:
In the world of gaming, having a high-performance laptop is essential to immerse yourself in the virtual realms with seamless gameplay and stunning visuals. To maximize your gaming laptop’s potential, optimizing its performance becomes crucial. This comprehensive guide will provide you with actionable tips and techniques to enhance your gaming laptop’s performance, ensuring you have an unparalleled gaming experience.
A Brief Overview
I. Why Gaming Laptop Performance Optimization Matters
- Highlight the significance of optimizing gaming laptop performance
- Discuss the benefits of improved performance, including smoother gameplay, reduced lag, and enhanced graphics
- Provide statistics or examples showcasing the impact of optimization on the gaming experience
II. Clearing the Path: Uninstalling Unnecessary Apps and Widgets
- Importance of decluttering your gaming laptop
- Identify apps and widgets that are no longer needed
- Step-by-step guide to uninstalling unwanted software and widgets effectively
- Benefits of removing unnecessary programs for improved responsiveness and system resources
III. Turbocharging Graphics: Overclocking the GPU
- Explain the concept of overclocking the graphics card for enhanced performance
- Address the limitations and potential risks associated with overclocking laptops
- Recommended methods and tools to safely overclock the GPU
- Importance of benchmarking and stress-testing to ensure stability and avoid overheating
IV. Power-Up: Adding More RAM
- Explore the role of RAM in gaming laptop performance
- Assessing the current RAM capacity and determining upgrade needs
- Detailed instructions on adding more RAM to the laptop
- Impact of increased RAM on gaming performance and multitasking capabilities
V. Keeping Pace: Updating Device Driver
- Importance of up-to-date device drivers for optimal performance
- Methods to check and update drivers manually or using driver update software
- Address common driver-related issues and performance impacts
- Highlight the benefits of updated drivers for gaming stability, security, and compatibility
VI. Temperature Control: Cleaning and Cooling
- Emphasize the significance of regular laptop cleaning for performance optimization
- Step-by-step guide to safely clean the laptop’s exterior and interior components
- Importance of maintaining proper airflow and cooling system functionality
- Explore additional cooling solutions such as liquid cooling or laptop cooling pads
Uninstall Unnecessary Apps and Widgets: Streamline Your Gaming Laptop for Optimal Performance
When it comes to gaming on your laptop, efficiency is key. To ensure your gaming laptop runs at its best, it’s essential to declutter your system by uninstalling any unnecessary apps or widgets. By freeing up valuable system resources, you can optimize performance and elevate your gaming experience to new heights. In this section, we’ll guide you through the process of uninstalling apps and widgets step-by-step, highlighting the benefits of decluttering for a seamless gaming journey.
Why is Decluttering Important?
Decluttering your gaming laptop holds significant importance in improving its overall performance. Over time, you may accumulate numerous apps and widgets that you no longer use. These unused programs consume valuable system resources, affecting your laptop’s responsiveness and potentially slowing down your gaming experience. By removing unnecessary apps and widgets, you can regain control over your system’s resources, ensuring a smoother and more enjoyable gaming adventure.
Step-by-Step Guide to Uninstalling Apps and Widgets
- Evaluate Your Apps and Widgets: Start by reviewing the installed apps and widgets on your laptop. Identify those that are no longer necessary or rarely used. Consider the impact of each app/widget on system performance and prioritize their removal accordingly.
- Access the Control Panel or Settings Menu: To uninstall apps and widgets, access the Control Panel (Windows) or Settings menu (Mac). On Windows, go to the Start menu, search for “Control Panel,” and open it. On Mac, click the Apple menu, select “System Preferences,” and choose “Applications” or “Extensions.”
- Navigate to “Programs and Features” or “Apps & Features”: Within the Control Panel or Settings menu, locate and click on “Programs and Features” (Windows) or “Apps & Features” (Mac). This will display a list of all installed programs and apps on your laptop.
- Select the Apps/Widgets to Uninstall: Scroll through the list and select the apps and widgets you want to uninstall. Click on them one by one to highlight and reveal the uninstall option.
- Click “Uninstall” and Follow the Prompts: After selecting an app or widget, click on the “Uninstall” or “Remove” button. Follow the on-screen prompts to confirm the uninstallation process. Some apps/widgets may require additional steps or prompts specific to their uninstallation process.
- Repeat the Process for All Unwanted Apps/Widgets: Repeat steps 4 and 5 until you have uninstalled all the unnecessary apps and widgets from your system.

Benefits of Freeing Up System Resources
By decluttering your gaming laptop and freeing up system resources, you can unlock several benefits:
- Enhanced Performance: Removing unnecessary apps and widgets improves your laptop’s performance by reducing background processes and freeing up memory and processing power. This leads to faster load times, smoother gameplay, and increased overall responsiveness.
- Improved Stability: A clutter-free system experiences fewer conflicts and crashes, resulting in improved stability during gaming sessions. By eliminating unnecessary apps and widgets, you minimize the chances of software-related issues interrupting your gameplay.
- Optimized Resource Allocation: With fewer apps and widgets running in the background, more system resources are available for your games. This optimized resource allocation allows your laptop to deliver higher frame rates, reduced input lag, and a more immersive gaming experience.
- Efficient System Maintenance: By reducing the number of installed apps and widgets, system maintenance becomes more manageable. Updates, driver installations, and overall system optimizations become less complex, saving you time and effort in the long run.
Decluttering your gaming laptop through the removal of unnecessary apps and widgets is an effective strategy to optimize its performance. By following the step-by-step guide outlined above, you can easily uninstall unwanted software and free up valuable system resources. The benefits of decluttering are numerous: enhanced performance, improved stability, optimized resource allocation, and efficient system maintenance.
Take control of your gaming experience by decluttering your laptop today. By doing so, you’ll unleash the true potential of your gaming laptop, allowing for smoother gameplay, faster load times, and an overall more enjoyable gaming adventure.
Remember, a clutter-free system paves the way for an immersive gaming experience. So, go ahead and uninstall those unnecessary apps and widgets, and get ready to level up your gaming performance!
Update Device Drivers: Enhancing Gaming Laptop Performance
Keeping your device drivers up to date is crucial for maximizing the performance of your gaming laptop. Device drivers act as a bridge between your laptop’s hardware and software, ensuring smooth communication and optimal functionality.
In this section, we will explore the significance of updating device drivers, methods to check for outdated drivers, how to update them manually or using driver update software, and the benefits of updated drivers for gaming performance.
The Significance of Keeping Device Drivers Up to Date
Device drivers play a vital role in your gaming laptop’s performance, security, and stability. Here’s why keeping them up to date is essential:
- Improved Performance: Updated drivers often include optimizations and bug fixes that enhance the performance of your laptop’s hardware components. By updating drivers, you can unlock the full potential of your graphics card, sound card, network adapter, and other essential devices, resulting in smoother gameplay and faster response times.
- Enhanced Compatibility: New game releases often require updated drivers to ensure compatibility with the latest software and hardware advancements. By regularly updating your drivers, you can avoid compatibility issues and enjoy seamless gaming experiences with the latest titles.
- Bug Fixes and Stability: Outdated drivers may contain bugs or compatibility issues that can lead to system crashes, freezes, or other stability problems. Updating drivers ensures that these issues are addressed, providing a more stable gaming environment and reducing the chances of disruptions during intense gameplay.
- Security Enhancements: Device driver updates often include security patches that protect your system from potential vulnerabilities. By keeping your drivers up to date, you can safeguard your gaming laptop against security threats and ensure a secure gaming experience.
Methods to Check for Outdated Drivers
To determine if your device drivers are outdated, you can utilize the following methods:
- Device Manager (Built-in on Windows): On Windows, you can access the Device Manager by right-clicking the Start button and selecting “Device Manager” from the context menu. In the Device Manager window, expand the categories and look for any devices with a yellow exclamation mark or a red “X” icon. These indicate outdated or problematic drivers.
- Manufacturer’s Website: Visit the official website of your laptop’s manufacturer or the specific hardware component manufacturers (such as NVIDIA, AMD, or Intel) to check for driver updates. Navigate to the support or downloads section, enter your laptop’s model number or select the appropriate hardware category, and download the latest drivers for your specific operating system.
- Driver Update Software: Driver update software automates the process of checking for and updating outdated drivers. These programs scan your system, identify outdated drivers, and provide you with a convenient way to update them. Popular driver update software includes Driver Booster, Driver Easy, and Snappy Driver Installer.
How to Update Drivers Manually or Using Driver Update Software
Updating drivers can be done manually or using driver update software. Here are the steps for both methods:
Manual Update:
- Identify the outdated driver through Device Manager or the manufacturer’s website.
- Visit the manufacturer’s website and download the latest driver for your specific hardware and operating system.
- Run the downloaded file and follow the on-screen instructions to install the updated driver.
- Restart your laptop to ensure the changes take effect.
Driver Update Software:
- Download and install a reputable driver update software of your choice.
- Launch the software and run a scan to detect outdated drivers.
- Review the scan results and select the drivers you want to update.
- Follow the prompts to update the selected drivers. The software will automatically download and install the latest versions.
- Restart your laptop to complete the driver update process.
Benefits of Updated Drivers for Gaming Performance
Updating your device drivers brings several benefits to your gaming laptop’s performance:
- Optimized Graphics Performance: Graphics card drivers play a crucial role in delivering smooth and immersive gaming experiences. Updated drivers often include performance optimizations specifically tailored for the latest games, ensuring you can enjoy high-quality visuals, improved frame rates, and reduced input lag.
- Reduced Compatibility Issues: Outdated drivers can result in compatibility issues with newer games or gaming platforms. By updating your drivers, you ensure seamless compatibility with the latest gaming software, preventing crashes, glitches, or other gameplay interruptions.
- Enhanced Audio Experience: Audio drivers are essential for delivering immersive soundscapes in games. Updated audio drivers can provide better audio quality, surround sound support, and advanced audio features, allowing you to fully immerse yourself in the gaming world.
- Improved Network Connectivity: Network drivers facilitate smooth online gaming experiences by optimizing network connectivity and reducing latency. Updated network drivers can improve network performance, reduce packet loss, and provide a more stable online gaming experience.
- Maximized Stability: Outdated drivers can contribute to system instability, leading to crashes or unexpected shutdowns during gaming sessions. Updated drivers often include stability fixes, addressing known issues and ensuring a smoother and more reliable gaming experience.
By regularly updating your device drivers, you can unlock the full potential of your gaming laptop, ensuring optimal performance, compatibility, and stability for all your gaming adventures.
Overclocking the Graphics Card: Boosting Gaming Laptop Performance
Overclocking your graphics card is a popular method to unlock additional performance from your gaming laptop. By increasing the clock speed and voltage of the graphics card, you can achieve higher frame rates and smoother gameplay.
In this section, we will explain the concept of graphics card overclocking, its benefits, precautions to consider, and provide a step-by-step guide to safely overclock your graphics card. We will also cover monitoring and troubleshooting techniques to ensure a successful overclocking experience.
Explanation of Graphics Card Overclocking and Its Benefits
Graphics card overclocking involves pushing the card beyond its factory-set speed limits to achieve higher performance. This process allows you to harness the full potential of your graphics card and enjoy smoother gameplay, improved frame rates, and enhanced visual quality. The primary benefits of overclocking your graphics card include:
- Increased Frame Rates: Overclocking can lead to higher frame rates, resulting in smoother animations and more responsive gameplay. This is particularly beneficial for fast-paced, graphically demanding games.
- Improved Visual Quality: Overclocking can help improve visual quality by allowing your graphics card to render more complex scenes and apply advanced graphics effects.
- Better Gaming Experience: With increased performance, your gaming laptop can handle newer and more demanding titles with ease, enhancing your overall gaming experience.
- Future-Proofing: Overclocking your graphics card can extend its lifespan by keeping it competitive with newer games and software updates.
Precautions and Considerations Before Overclocking
Before diving into overclocking, it is important to consider the following precautions:
- Temperature Management: Overclocking generates more heat, which can lead to instability or even damage to your graphics card. Ensure your laptop has adequate cooling, including proper airflow and functional cooling fans.
- Warranty Implications: Overclocking may void the warranty of your graphics card. Check your laptop manufacturer’s warranty terms and conditions to understand the impact on warranty coverage.
- Stability Testing: Overclocking can introduce instability or artifacts in games. Testing your overclocked settings thoroughly is crucial to ensure stability and avoid crashes or glitches.
- Gradual Overclocking: Start with conservative overclocking settings and gradually increase them to find the optimal balance between performance and stability.
- Power Supply Considerations: Ensure that your laptop’s power supply can handle the increased power demand when overclocking the graphics card. Insufficient power can lead to instability or system shutdowns.
Step-by-Step Guide to Safely Overclocking the Graphics Card
Follow these steps to safely overclock your graphics card:
- Research and Preparation: Familiarize yourself with your graphics card model and its overclocking capabilities. Read online resources, forums, and guides specific to your card.
- Overclocking Software: Download and install reliable overclocking software like MSI Afterburner, EVGA Precision X, or ASUS GPU Tweak. These programs provide an intuitive interface to adjust clock speeds, voltages, and fan settings.
- Baseline Performance: Use benchmarking software like 3DMark to establish your graphics card’s baseline performance. This will help you track improvements and stability as you overclock.
- Temperature Monitoring: Install a temperature monitoring tool such as HWMonitor or GPU-Z. Monitor your graphics card’s temperature during overclocking to ensure it remains within safe limits.
- Gradual Overclocking: Start by increasing the core clock speed by a small increment, such as 10-20 MHz. Apply the changes and test stability by running benchmarking software or playing demanding games for an extended period.
- Stress Testing: Use stress testing utilities like FurMark or Unigine Heaven tosimulate intense graphics loads and check for stability. Monitor temperatures and look for artifacts or crashes. If instability occurs, reduce the overclocked settings slightly and retest.
- Memory Clock and Voltage: After achieving a stable core clock speed, you can experiment with increasing the memory clock and voltage incrementally. Again, stress test and monitor for stability and temperature.
- Fine-Tuning: Continuously fine-tune your overclocked settings, finding the highest stable clock speeds while keeping temperatures within safe limits. Remember that each graphics card is unique, so there is no one-size-fits-all approach.
- Save Profiles: Once you find stable settings, save them as profiles in your overclocking software. This allows you to switch between different profiles based on your gaming needs.
Monitoring and Troubleshooting Techniques
During and after overclocking, it’s important to monitor your graphics card’s performance and address any issues that may arise. Here are some monitoring and troubleshooting techniques:
- Temperature Monitoring: Continuously monitor your graphics card’s temperature during gaming sessions using monitoring software. If temperatures exceed safe limits, adjust your overclocked settings or improve your laptop’s cooling.
- Artifact Detection: Watch for visual artifacts, such as graphical glitches or screen flickering, during gameplay. These can be indications of an unstable overclock. Reduce clock speeds or increase voltage slightly to address these issues.
- Driver Updates: Keep your graphics card drivers up to date. New driver releases often include optimizations and bug fixes that can enhance stability and performance.
- Reverting to Default Settings: If you encounter stability issues or are unsatisfied with the overclocked performance, revert your graphics card settings to their default values. This will restore the card to its original state.
Remember, overclocking involves some trial and error. Be patient and don’t rush the process. Take your time to find the optimal balance between performance and stability.
Also, read about App for Laptop-Acsoon
Upgrade RAM for Enhanced Performance: Unleashing the Power of Your Gaming Laptop
When it comes to maximizing the performance of your gaming laptop, upgrading the RAM (Random Access Memory) is a highly effective and relatively simple solution. In this section, we will explore the importance of RAM in gaming laptop performance, guide you on how to check your current RAM capacity and compatibility, provide a step-by-step guide to adding more RAM, and recommend different RAM configurations based on your gaming needs.
Importance of RAM in Gaming Laptop Performance
RAM plays a crucial role in the overall performance of your gaming laptop. It serves as temporary storage for data that the CPU (Central Processing Unit) needs to access quickly. Here are the key reasons why RAM is essential for an enhanced gaming experience:
- Faster Processing Power: Upgrading your RAM allows your gaming laptop to handle more data simultaneously. This results in faster loading times, smoother gameplay, and reduced lag.
- Improved Multitasking: With more RAM, your laptop can efficiently run multiple applications and processes in the background while gaming. This enables seamless multitasking, such as streaming, voice chat, or running game capture software.
- Optimal Game Performance: Many modern games require a significant amount of RAM to run smoothly. Insufficient RAM can lead to decreased frame rates, stuttering, and overall performance issues.
- Future-Proofing: As games continue to evolve and demand more system resources, having ample RAM ensures your laptop remains capable of handling upcoming titles without compromising performance.
How to Check Current RAM Capacity and Compatibility
Before upgrading your RAM, it’s important to determine your current RAM capacity and compatibility. Follow these steps to check your laptop’s RAM configuration:
1. Open Task Manager: Right-click on the taskbar and select “Task Manager” from the context menu.
2. Navigate to the “Performance” Tab: In the Task Manager window, click on the “Performance” tab.
3. Check Memory Usage: Under the “Memory” section, you can see the total installed RAM capacity and how much is currently in use. Make note of the capacity for reference.
4. Determine RAM Compatibility: To ensure compatibility, check the laptop’s specifications or manufacturer’s website for the supported RAM type (e.g., DDR4, DDR3), maximum capacity, and frequency (e.g., 2400MHz, 3200MHz).
Step-by-Step Guide to Adding More RAM
Adding more RAM to your gaming laptop is a straightforward process. Follow these steps to upgrade your laptop’s RAM:
- Purchase Compatible RAM: Based on the compatibility information gathered earlier, purchase RAM modules that match your laptop’s specifications. It is recommended to buy from reputable brands to ensure reliability and compatibility.
- Prepare Your Laptop: Shut down your laptop and disconnect the power cord. Carefully remove the battery if it’s removable.
- Locate the RAM Slots: Refer to your laptop’s user manual or manufacturer’s website to find the location of the RAM slots. Typically, the slots are accessible by removing a panel on the bottom of the laptop.
- Remove Existing RAM (If Applicable): If there are already RAM modules in place, gently spread the retention clips on either side of the module. The module will pop up at an angle, allowing you to remove it.
- Insert the New RAM Modules: Align the notch on the RAM module with the slot in the RAM bay. Insert the module at a slight angle and press it down firmly until the retention clips snap into place on both sides.
- Repeat for Additional Modules: If you are adding multiple RAM modules, repeat the process for each module, ensuring they are properly seated in the respective RAM slots.
- Secure the RAM Bay: Once all the new RAM modules are installed, ensure they are securely in place by gently pressing down on them.
- Reassemble Your Laptop: Replace any panels or covers that were removed to access the RAM slots. Reinsert the battery if it was removed.
- Power Up Your Laptop: Connect the power cord and turn on your laptop. The system should automatically recognize the new RAM and adjust accordingly.
- Verify RAM Upgrade: To confirm the successful RAM upgrade, repeat the earlier steps to check the total installed RAM capacity in the Task Manager. It should now reflect the increased amount.
Recommended RAM Configurations for Different Gaming Needs
The ideal RAM configuration for your gaming laptop depends on various factors, such as the types of games you play and your budget. Here are some recommendations based on different gaming needs:
- Casual Gaming: For casual gaming and general multitasking, upgrading to 8GB of RAM is typically sufficient. It provides a noticeable improvement over lower capacities and allows you to run most games smoothly.
- Mid-Range Gaming: If you engage in more demanding games and multitasking activities, upgrading to 16GB of RAM is recommended. This configuration ensures smoother gameplay, faster loading times, and enhanced overall performance.
- Enthusiast Gaming: Enthusiast gamers who play resource-intensive games, engage in content creation, or stream their gameplay should consider upgrading to 32GB or more. This higher capacity provides ample headroom for seamless multitasking and optimal performance.
Remember to consider your laptop’s limitations and specifications when deciding on the RAM upgrade. Some laptops may have a maximum supported capacity or restrictions on the RAM frequency.
Optimize System Settings for Gaming: Unleashing the Full Potential of Your Gaming Laptop
To ensure optimal gaming performance on your laptop, it’s essential to optimize your system settings. In this section, we will explore various techniques and adjustments that can significantly enhance your gaming experience.
From adjusting power settings for optimal performance to optimizing graphics settings and managing background processes, we will cover everything you need to know to get the most out of your gaming laptop on both Windows and macOS platforms.
Adjusting Power Settings for Optimal Performance
One of the first steps in optimizing your gaming laptop is to adjust the power settings to prioritize performance. Follow these steps to optimize power settings on your laptop:
Windows:
- Open Power Options: Go to the Control Panel, then navigate to Power Options.
- Select High-Performance Plan: Choose the High-Performance power plan to ensure your laptop operates at maximum performance.
macOS:
- Access Energy Saver Preferences: Click on the Apple menu, then go to System Preferences > Energy Saver.
- Enable High-Performance Graphics: Check the box next to “Automatic graphics switching” to disable it and ensure your laptop uses the dedicated graphics card for optimal gaming performance.
By adjusting the power settings, you prevent your laptop from throttling performance and ensure consistent power delivery to maximize gaming performance.
Graphics Settings and Optimization Techniques
Optimizing your graphics settings can have a significant impact on your gaming experience. Follow these guidelines to optimize graphics settings for smoother gameplay:
- Resolution: Set the resolution to the native resolution of your laptop’s display for the best balance between visuals and performance.
- Texture Quality: Adjust the texture quality to a level that suits your preference and system capabilities. Higher settings provide more detailed textures but may impact performance.
- Anti-Aliasing: Enable anti-aliasing techniques such as FXAA or MSAA to reduce jagged edges and enhance visual quality. Experiment with different levels to find the balance between image smoothness and performance.
- Shadows and Effects: Adjust shadow and effects settings based on your system’s capabilities. Lower settings can improve performance, while higher settings offer more realistic visuals.
- V-Sync and Frame Rate: Consider disabling V-Sync for lower input lag and smoother gameplay. If your laptop can handle it, aim for a higher frame rate (e.g., 60 FPS or higher) to achieve a more responsive and fluid gaming experience.
- Driver Updates: Keep your graphics card drivers up to date to ensure compatibility with the latest games and optimal performance. Visit the manufacturer’s website or use automatic driver update software to install the latest drivers.
Optimizing graphics settings allows you to strike the right balance between visual fidelity and smooth performance, tailored to your laptop’s capabilities.
Managing Background Processes and Startup Items
Background processes and unnecessary startup items can consume system resources, potentially impacting gaming performance. Follow these steps to manage them effectively:
Windows:
- Disable Startup Programs: Open the Task Manager, go to the Startup tab, and disable unnecessary programs from launching at startup. Right-click on the program and choose “Disable.”
- Manage Background Processes: Use the Task Manager to identify resource-intensive background processes. If any processes are not essential for gaming, right-click on them and select “End Task.”
macOS:
- Disable Login Items: Go to System Preferences > Users & Groups > Login Items. Remove unnecessary applications from the list by selecting them and clicking the “-” button.
- Monitor Activity Monitor: Use the Activity Monitor to identify resource-consuming processes. If any processes are not required for gaming, select them and click on the “Quit” button.
By minimizing background processes and disabling unnecessary startup items, you can free up system resources and allocate them to your games, resulting in smoother gameplay and improved performance.
Tips for Optimizing Gaming Performance on Windows and macOS
Here are some additional tips to optimize gaming performance on both Windows and macOS platforms:
- Keep Your System Updated: Regularly update your operating system to ensure you have the latest performance optimizations, bug fixes, and security patches.
- Close Unnecessary Applications: Before launching a game, close any unnecessary applications running in the background to free up system resources.
- Clear Disk Space: Regularly clean up your hard drive or SSD by removing unnecessary files and applications. This helps maintain optimal system performance.
- Disable Resource-Intensive Features: Disable resource-intensive features such as screen recording or streaming software, antivirus scans, or automatic updates during your gaming sessions.
- Use Game Mode or Game Boost Software: Some laptops and operating systems offer built-in game mode or game boost features. Enable these modes to prioritize gaming performance and allocate system resources accordingly.
- Monitor System Temperature: Keep an eye on your laptop’s temperature while gaming. High temperatures can cause performance throttling. Use temperature monitoring software and ensure proper ventilation and cooling for your laptop.
- Consider Gaming Accessories: Invest in gaming accessories such as a gaming mouse or keyboard for improved responsiveness and precision during gameplay.
By following these optimization techniques and tips, you can unlock the full potential of your gaming laptop and enjoy a smooth, immersive gaming experience.
Maintain Proper Cooling and Cleanliness: Keeping Your Gaming Laptop Cool and Efficient
Maintaining proper cooling and cleanliness is crucial for maximizing the performance and lifespan of your gaming laptop. In this section, we will explore the importance of cooling system maintenance, effective cleaning techniques for laptop internals and peripherals, preventing overheating and thermal throttling, and utilizing laptop cooling pads and external cooling solutions.
Importance of Cooling System Maintenance
Adequate cooling is essential for optimal performance and longevity of your gaming laptop. Here’s why cooling system maintenance is crucial:
- Heat Dissipation: Gaming laptops generate significant heat during intense gameplay. Proper cooling ensures efficient heat dissipation, preventing overheating and potential hardware damage.
- Performance Stability: Excessive heat can lead to thermal throttling, where the laptop reduces performance to prevent overheating. Maintaining proper cooling helps maintain stable performance during gaming sessions.
- Component Longevity: Overheating can shorten the lifespan of internal components, including the CPU and GPU. By keeping temperatures under control, you can extend the life of your gaming laptop.
Cleaning Techniques for Laptop Internals and Peripherals
Regular cleaning of your gaming laptop is vital to remove dust and debris that can hinder airflow and cause overheating. Follow these cleaning techniques:
1. Internal Cleaning:
- Compressed Air: Use compressed air to blow away dust from vents, fans, and heat sinks. Hold the can upright and in short bursts to prevent moisture buildup.
- Soft Brush: Gently brush away dust from the keyboard, ports, and other areas. Be cautious not to apply excessive force or use abrasive materials.
2. Peripheral Cleaning
- Screen: Use a microfiber cloth and screen-cleaning solution to remove smudges and fingerprints from the screen. Avoid using harsh chemicals or abrasive materials.
- Keyboard and Touchpad: Use compressed air or a soft brush to dislodge dust and debris from the keys and touchpad. Wipe them down with a slightly damp cloth.
Preventing Overheating and Thermal Throttling
To prevent overheating and thermal throttling, consider the following preventive measures:
Ventilation and Airflow:
- Elevate the Laptop: Place your laptop on a hard, flat surface that allows for better airflow beneath the device.
- Clear Vents: Ensure the vents are clear of obstructions. Avoid using the laptop on soft surfaces like beds or couches that can block airflow.
Room Temperature:
Cool Environment: Play games in a well-ventilated room with a moderate ambient temperature. Avoid excessively hot or humid environments that can exacerbate overheating.
Avoid Blocking Air Intakes:
Proper Positioning: Be mindful of where you place your laptop during gameplay. Avoid covering air intakes with your hands or other objects.
Using Laptop Cooling Pads and External Cooling Solutions
Laptop cooling pads and external cooling solutions can provide additional cooling for your gaming laptop. Consider the following options:
Laptop Cooling Pads:
Elevated Platform: Cooling pads feature built-in fans and an elevated platform that improves airflow around the laptop.
USB-Powered: These pads are usually USB-powered and offer adjustable fan speeds for optimal cooling.
External Cooling Solutions:
Cooling Stands: These stands have additional fans that provide enhanced cooling while elevating the laptop.
Cooling Mats: Cooling mats utilize a cooling gel that absorbs heat from the laptop, keeping it cool during extended gaming sessions.
By incorporating laptop cooling pads or external cooling solutions, you can further enhance the cooling efficiency of your gaming laptop, maintaining optimal performance and ensuring its longevity.
Furthermore, considering the use of laptop cooling pads or external cooling solutions can provide additional cooling and improve overall performance during intense gaming sessions. These solutions enhance airflow and dissipate heat effectively, allowing your laptop to operate at optimal temperatures.
By prioritizing cooling system maintenance and cleanliness, you can enjoy a cool and efficient gaming experience while prolonging the lifespan of your gaming laptop.
Conclusion: Elevate Your Gaming Experience with Optimized Laptop Performance
In conclusion, by implementing the techniques outlined in this guide, you can optimize the performance of your gaming laptop and elevate your gaming experience. Take the necessary steps to declutter your system, overclock your graphics card safely, upgrade your RAM, keep device drivers up to date, and maintain proper cooling and cleanliness.
Now, armed with this knowledge, it’s time to put it into action. Follow the steps outlined in each section and witness the transformation in your gaming laptop’s performance. Enjoy smoother gameplay, faster frame rates, and an overall enhanced gaming experience.
Remember, a well-optimized gaming laptop not only improves your gaming sessions but also ensures your laptop’s longevity and reliability. So, invest the time and effort to implement these techniques, and prepare to embark on an exciting gaming journey like never before.